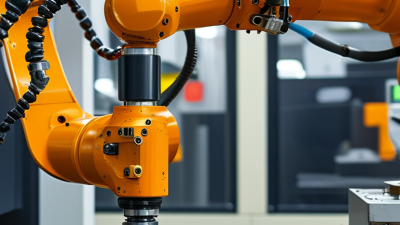
Choosing a robot tool changer is not simply a matter of matching flange sizes. It is a production decision involving payload, repeatability, utilities, safety, and maintenance. A small mismatch can create visible problems: a gripper may sit slightly off-center, an air line may twist, or a sensor may fail during a night shift.
Rodney Brooks, founder of Rethink Robotics, wrote, “The robots are coming, and they are going to change the way we work.” His observation also applies to robot tool changer selection. Flexible automation depends on reliable tool exchange. A changer must support the robot’s actual workload, not just its rated maximum. Check the combined weight of the tool, workpiece, cables, and fittings. Then examine locking confirmation, repeatability, corrosion resistance, and protection from dust or coolant.
Details matter.
A welding cell may need strong mechanical locking and protected electrical contacts. A packaging line may value fast changeovers and low tool weight. A machining application may require higher rigidity, coolant resistance, and carefully managed pneumatic connections. Automatic coupling can reduce manual intervention, but it does not remove the need for inspection. Sensors, seals, and mounting bolts still require planned checks.
There is no universally best robot tool changer. That is the uncomfortable part. A technically impressive model can perform poorly when its utility ports are misplaced or its maintenance access is awkward. Measure the real operating environment. Test the complete tool assembly before purchase. If possible, run repeated cycles under production-like loads. Reliable selection comes from evidence, not catalogue confidence alone.

A robot tool changer is a mechanical interface that lets one robot use several end effectors. It connects the robot wrist to a gripper, welding tool, suction device, or inspection sensor. The system usually has two parts: a master plate on the robot and a tool plate on each attachment. An operator or automatic station stores unused tools in fixed locations.
The changing cycle is simple but carefully controlled. The robot approaches the selected tool and aligns both plates. A pneumatic, electric, or mechanical locking mechanism then secures the connection. Internal passages may transfer air, electricity, data, or fluid. Sensors confirm that the lock is engaged before the robot moves. In practical installations, this signal is essential. A loose tool can damage a workpiece, the robot, or nearby equipment.
Choosing a tool changer requires more than matching payload numbers. Check the tool’s weight, working torque, connection frequency, environment, and required utilities. The changer should also provide repeatable positioning and enough clearance for automatic storage. I would test the complete assembly, not only the changer itself. Cable routing often creates unexpected strain. Dust and repeated impacts can also reduce performance. A specification sheet may look perfect, yet real production reveals small alignment problems. That is where careful trials matter. Keep replacement seals, inspect locking surfaces, and record missed connection events. Reliability grows from these ordinary details.
A robot tool changer is a mechanical interface that allows a robot to automatically connect and release end-of-arm tooling. The ISO 9409-1 nominal flange size is an important starting point because the tool changer must match the robot wrist mounting pattern.
The chart shows common ISO 9409-1 nominal flange diameters in millimeters. Select a compatible interface first, then verify the tool changer’s rated payload, allowable moment, locking mechanism, repeatability, pneumatic or electrical connections, and safety-status monitoring for the intended application.
How to Choose a Robot Tool Changer?
Which Robot, Tool, and Workspace Requirements Should You Define?
Choosing a robot tool changer starts with the robot’s real operating conditions. Define payload, wrist load, reach, speed, and mounting pattern. Include the tool changer’s weight, not just the tool weight. A small calculation error can reduce motion quality or overload the wrist. Check repeatability under acceleration, not only during slow testing. That detail is often missed.
Define every tool the robot may carry. Record each tool’s mass, center of gravity, connection type, and required utilities. Pneumatic lines, electrical signals, coolant, and data connections need compatible interfaces. Measure change time during a complete cycle. A fast changer is not useful if operators must manually reset cables. Tool storage also needs fixed positions and clear access. Labels help during maintenance.
The workspace creates different demands. Dust, heat, moisture, chips, and vibration can affect locking mechanisms and sensors. Confirm clearance around the changer when the robot rotates near fixtures. In commissioning work, I have seen a tool fit correctly but collide with a guard during a wrist turn. That mistake required redesigning the cell. I also prefer testing several hundred change cycles before production. It exposes wear, alignment drift, and awkward maintenance access. A basic checklist is valuable, but it cannot replace observing the full process.
Selecting the coupling and locking mechanism is critical to robot performance. The connection must handle payload, torque, vibration, and repeated impacts. Begin with the tool’s real operating load, not its catalog weight. Include grippers, cables, workpieces, and acceleration forces. A lightweight coupling can fail when the robot changes direction quickly. Check the allowable moment and torsional capacity carefully. Repeatability also matters. A few hundredths of a millimeter can affect insertion, dispensing, or inspection accuracy.
Tips: Choose a fail-safe lock that stays engaged during air or power loss. Confirm the locked and unlocked signals with physical sensors. Test the mechanism with dust, oil, and thermal changes. Clean contact surfaces regularly. Misalignment tolerance is useful, but it should not excuse poor robot programming.
Pneumatic locks suit many automated cells because they provide strong clamping force and clear operating states. Electric or spring-assisted systems may fit installations with limited air supply. Examine cycle life, maintenance access, spare seals, and manual release procedures.
In practical commissioning, teams often discover that connector clearance was underestimated. I have also seen compact couplings selected too quickly, leaving little room for cleaning or cable movement. That choice may work in a test cell, but fail after thousands of cycles.
A reliable selection balances locking strength, sensor feedback, serviceability, and the actual environment. Test the complete tool assembly before production approval.
How to Choose a Robot Tool Changer?
Load capacity should be measured under motion, not only in a stationary catalog table. A gripper carrying eight kilograms may create much higher wrist torque when its center of gravity sits 300 millimeters away. Check payload, bending moments, inertia, acceleration, and the safety factor together. In practical trials, I measure the tool flange temperature and cycle time after several hours. Heat and vibration can expose limits that short tests miss. More capacity is not always better.
Accuracy includes both positioning and repeatability after repeated tool changes. A changer may return within a few hundredths of a millimeter in clean conditions, then drift when chips or dust enter the interface. Use a dial indicator or calibrated vision system to verify actual results. Test at different approach angles. Small errors become visible when a robot inserts connectors or places components into tight fixtures. The test setup must match production conditions.
Utility options often decide whether installation stays simple. Pneumatic ports support clamps, while electrical contacts carry sensors, valves, or identification signals. Fluid passages can help with cooling, but they add sealing and maintenance requirements. Count every connection before choosing the model. I have seen projects focus on payload and overlook cable bend radius. That mistake can shorten cable life. Keep spare circuits available. Future tools rarely match the original plan exactly. Some specifications still look convincing, but field validation should have the final word.
| Comparison Dimension | What to Check | Micro / Light-Duty Class | Compact Class | Medium Class | Heavy-Duty Class | Selection Guidance |
|---|---|---|---|---|---|---|
| Recommended Robot Payload | Robot payload range normally used with the changer and tooling. | 3–10 kg | 10–30 kg | 30–100 kg | 100–300 kg | Select a changer whose rated load exceeds the complete tool assembly, not only the gripper. |
| Maximum Tool Load | Combined mass of the tool, workholding device, cables, hoses, and workpiece carried by the tool. | 1–5 kg | 5–20 kg | 20–80 kg | 80–250 kg | Include an engineering margin, commonly 20–30% or more for dynamic applications. |
| Allowable Bending Moment | Permitted moment caused by tool offset and acceleration. | 5–15 N·m | 15–60 N·m | 60–250 N·m | 250–1,000 N·m | Calculate moment as force multiplied by the distance from the changer face to the tool’s center of gravity. |
| Allowable Torque | Permitted twisting load around the tool-changer axis. | 3–10 N·m | 10–40 N·m | 40–180 N·m | 180–700 N·m | Check torque during acceleration, emergency stops, and off-center gripping rather than only during static operation. |
| Repeatability | Typical tool re-docking repeatability measured at the interface. | ±0.01–0.02 mm | ±0.01–0.03 mm | ±0.02–0.05 mm | ±0.03–0.08 mm | For precision machining or inspection, evaluate repeatability together with tool stiffness and robot accuracy. |
| Locking Method | Mechanism that secures the tool plate during robot operation. | Spring lock with pneumatic release | Mechanical lock with pneumatic release | Mechanical wedge or ball-lock system | Heavy-duty wedge, ball-lock, or multi-point locking system | Prefer a fail-safe design that remains locked if air or electrical power is lost. |
| Lock Confirmation | Feedback proving that the tool is fully seated and locked. | 1 lock sensor; optional tool-present sensor | Lock and tool-present sensors | Redundant lock and tool-present monitoring | Redundant sensors plus mechanical visual indicator | Use independent locked and unlocked signals in the robot safety logic. |
| Pneumatic Utilities | Number of compressed-air passages available through the changer. | 2–4 passages | 4–8 passages | 6–16 passages | 8–24 passages | Allow separate circuits for grippers, blow-off, vacuum generation, and tool cleaning when required. |
| Electrical Utilities | Electrical contacts for sensors, valves, motors, identification, or tool data. | 4–12 contacts | 8–24 contacts | 12–40 contacts | 20–80 contacts or hybrid connectors | Confirm current, voltage, contact protection, and whether signals are suitable for repeated mating cycles. |
| Fluid or Coolant Passages | Optional channels for water, hydraulic fluid, or other process media. | Usually unavailable or 1–2 passages | 1–4 passages | 2–8 passages | 4–12 passages | Check pressure, temperature, seal material, cleanliness, and compatibility with the process fluid. |
| Vacuum Capability | Dedicated vacuum channels or compatible pneumatic routing for vacuum tools. | Optional; typically 1–2 channels | Optional; typically 1–4 channels | Typically 2–6 channels | Typically 4–12 channels | Specify whether the system requires vacuum supply, vacuum return, pressure monitoring, or blow-off. |
| Tool Identification | Method used to verify that the correct tool is attached. | Proximity sensor or coded pin | Coded sensor or electrical identification | Electrical identification module or coded interface | Digital identification, RFID, or controller-integrated verification | Use positive tool identification when multiple tools have similar physical interfaces. |
| Cycle Life | Expected number of coupling and uncoupling cycles before inspection or component replacement. | 100,000–500,000 cycles | 250,000–1,000,000 cycles | 500,000–2,000,000 cycles | 1,000,000+ cycles with scheduled maintenance | Treat cycle life as application-dependent; contamination, side loading, and poor alignment can reduce service life. |
| Operating Environment | Protection against dust, moisture, coolant, welding spatter, and temperature variation. | Clean indoor automation | General industrial environments | Industrial environments with moderate contamination | Heavy contamination, welding, casting, or machining environments | Verify enclosure rating, corrosion resistance, seal design, and whether protective covers are needed. |
| Overall Size and Mass | Changer weight and envelope, which affect robot payload and reachable workspace. | Approximately 0.2–1 kg | Approximately 0.8–3 kg | Approximately 2–10 kg | Approximately 8–35 kg | Subtract changer and tool weight from the robot’s rated payload before calculating the usable workpiece load. |
| Best-Fit Applications | Typical applications suited to the class. | Small grippers, cameras, sensors, light assembly | Material handling, packaging, dispensing, light machining | Welding, medium gripping, palletizing, machining tools | Large grippers, spot welding, die handling, heavy machining | Choose the smallest class that meets dynamic load and utility requirements with adequate margin. |
Important: Load, moment, torque, accuracy, pressure, electrical current, and cycle-life values should be validated against the final robot motion profile and the manufacturer’s certified technical data before installation.
How to Choose a Robot Tool Changer?
What Safety, Maintenance, and Integration Factors Should You Verify?
Choosing a robot tool changer starts with the safety circuit, not the catalog. Verify that the locking mechanism remains engaged during power loss. A dual confirmation signal is valuable, but it is not proof by itself. Test sensors with real tools, empty cycles, and controlled fault conditions. Check payload, torque, tool offset, and gripping force against the robot’s actual motion. A forgotten center-of-gravity change can turn a slow move into a dangerous swing. Use risk assessment methods aligned with applicable machinery safety requirements, including ISO 10218 where relevant.
Maintenance details often decide whether reliability lasts beyond commissioning. Inspect locking pins, contact surfaces, seals, cables, and air fittings at defined intervals. Remove dust and metal chips before they reach the coupling face. Record cycle counts and small changes in locking force. Lubrication must match the supplier’s instructions; too much grease can attract abrasive debris. Do not rely on a clean appearance. A visual check may miss a worn pin or leaking seal.
Integration requires more than matching bolt patterns. Confirm pneumatic pressure, electrical pin assignments, grounding, cable bend radius, and tool presence detection. The robot controller should exchange clear lock, unlock, and fault signals with the changer. Test recovery after a failed tool pickup, interrupted cycle, and unexpected restart. Run slow dry cycles before production speed. A rushed commissioning can hide timing errors that appear only after heating or repeated motion. Even experienced teams miss one detail sometimes. Every change needs recorded verification.